Triton Student System (TSS) Login and Navigation
TSS is UC San Diego's new student information system, replacing MyTritonLink for Fall 2026. It's the tool you'll use to book courses, see your schedule and grades, take care of billing, financial aid, and more.
Logging in to TSS
There are two ways to log into TSS: navigating from the UC San Diego website and using the direct TSS link. Both options are outlined below.
Logging in via the UC San Diego website.
1. Open your web browser. Navigate to www.ucsd.edu and click on Academics. This opens a dropdown menu.

2. Click on TritonLink in the Academics dropdown menu.

3. Once on the TritonLink website, click on the Triton Student System icon on the top right side of the screen.

4. There are two options on the login screen: Extended Studies and UCSD SSO. Extended Studies is for the Division of Extended Studies students and main campus alumni. UCSD SSO is for employees and main campus students (undergraduate, graduate, health sciences, etc.). Click on the corresponding button for your classification.

5. Next, you will land on the Single Sign-On login page. Type your UCSD email address (TritonLink user name) and password into the fields and click Login.
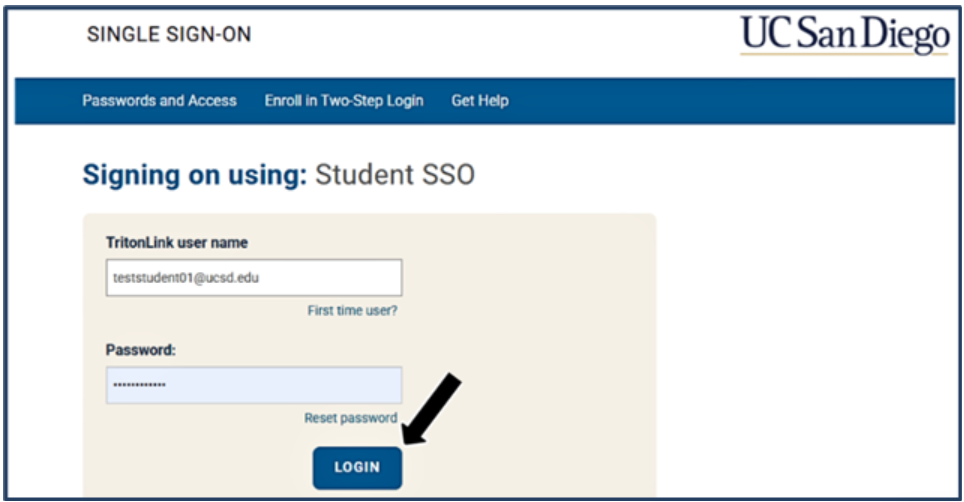
6. Complete two-factor authentication via Duo.

NOTE: For more information about setting up DUO dual authentication, visit the Two-Step Login Blink page.
Logging in via the Direct TSS Link
1. Use the direct TSS link: sis.ucsd.edu
2. There are two options on the login screen: Extended Studies and UCSD SSO.- Extended Studies is for the Division of Extended Studies students and main campus alumni.
- UCSD SSO is for employees and main campus students (undergraduates, graduate students, Schools of Medicine and Pharmacy, etc.).
- Click on the corresponding button for your classification.
3. Next, you will land on the Single Sign-On login page. Type your UCSD email address (TritonLink user name) and password into the fields and click Login.
4. Complete two-factor authentication via Duo.
NOTE: For more information about setting up DUO dual authentication, visit the Two-Step Login Blink page.
TSS Homepage Overview
1. You will now arrive at the TSS Homepage. At the top of the screen, you will see two tabs: My Home and Student. You are currently on the My Home tab.

2. Toward the top of the screen, you'll see a section called Pages. Underneath, you will see a Student tile. Click the Student tile to go to your Student Overview.

Tip: You can also click the Student tab at the top of the screen to go directly to your Student Overview — it takes you to the same place as the Student tile.
Note: You may receive a timeout error after a period of inactivity. If you can't log back in by refreshing your browser, open a new tab and use the TSS login link to return to the login page. You'll be prompted to complete Single Sign-On again.
First Steps After Login
The first time you log in — and any time your personal information requires review — you may see a Verify Personal Details prompt. This is asking you to confirm that your contact information on file is current. Click Verify to acknowledge and continue to your Student Overview Homepage.

When you login into TSS for the first time,
make sure you take the following actions:
- Review and update your personal information, including addresses and emergency contact information.
- Check your academic information, including major/minor information and schedule information, once available.
- Enter your direct deposit information in TSS. Your current direct deposit information in TritonLink will not be transferred to TSS. You will need to re-enroll in direct deposit in TSS. If your direct deposit information is missing or out of date, university payments or stipends may be delayed. For more information about Direct Deposit and the pause on Financial Aid disbursements during the TSS transition read this important notice on updating your Direct Deposit information.
Your Student Overview Homepage
Your Student Overview Homepage is your central hub in TSS. On the left, you'll see your profile card displaying your name, Triton Student Number (TSN), and university email address.
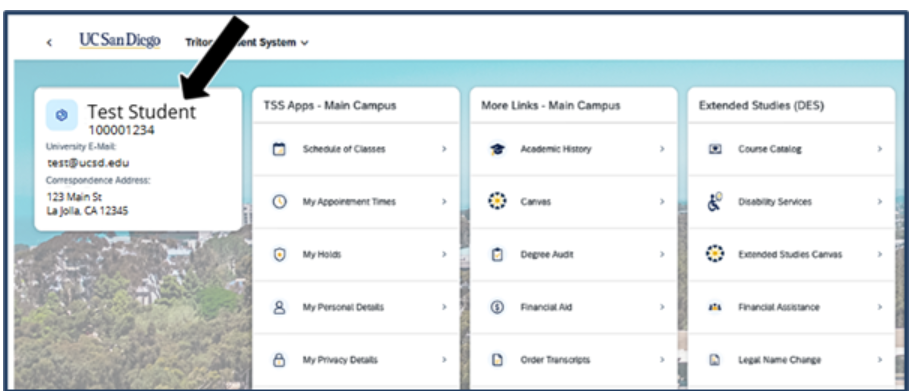
💡Tip: You can rearrange the sections on your Student Overview by clicking and dragging any of the boxes to a new position on the page.
NOTE: Both Main Campus and Extended Studies (DES) sections will show for all students regardless of current program. This is expected behavior. If you are a Main Campus student, you can ignore the Extended Studies (DES) section. If you are an Extended Studies (DES) student, you can ignore the Main Campus section.
The main panel is organized into several sections:
-
TSS Apps – Main Campus: Links to your most-used student tools, including:
- Schedule of Classes: Search for available courses by course number or section. A search bar is also available directly on your Student Overview page for quick access.
- Note: A Schedule of Classes search bar also appears lower on your Student Overview page — this is a shortcut to the same tool. You can use either one to search for courses.
- My Appointment Times: View your assigned booking window — the date and time when your course booking opens each quarter.
- My Holds: View any holds on your account that may prevent you from booking courses or accessing other services. Holds must be resolved before you can book. Read more about Holds in TSS.
- My Personal Details: View and update your personal information on file with the university.
- My Privacy Details: Manage your Family Educational Rights and Privacy Act (FERPA) privacy settings and control what information the university may share. Read more about Privacy Details in TSS.
- My Bank Accounts: Add or update your bank account information for direct deposit of financial aid refunds or other payments.
- Triton Enrollment Authorization (TEA): Submit a request to book a course when a restriction would otherwise prevent you from doing so.

- Schedule of Classes: Search for available courses by course number or section. A search bar is also available directly on your Student Overview page for quick access.
- More Links – Main Campus: Quick access to Canvas, Degree Audit, Financial Aid, TritonPay, Triton Cash Account, and U.S. Citizens Register to Vote.
- Academic History: View your academic record, including past coursework and grades.
- Canvas: Access your course sites and learning materials.
- Degree Audit: Review your progress toward degree completion.
- Financial Aid: Access your financial aid information and award details.
- TritonPay: View and pay your student account balance.
- Triton Cash Account: Manage your Triton Cash funds.
- U.S. Citizens Register to Vote: Access voter registration resources.

- Extended Studies (DES): Links to tools specific to Division of Extended Studies students. If you are a Main Campus student, this section may not be visible or may not apply to you.
- Course Catalog: Browse courses available through Extended Studies.
- Disability Services: Access disability support resources for Extended Studies students.
- Extended Studies Canvas: Access your Extended Studies course sites and learning materials.
- Financial Assistance: View financial assistance options available through Extended Studies.
- Legal Name Change: Submit a request to update your legal name on file.
- My Applications: View and manage your Extended Studies applications.
- My Personal Details: View and update your personal information on file.
- My Privacy Details: Manage your FERPA privacy settings.
- My Holds: View any holds on your Extended Studies account.
- Student Services Contact Information: Find contact information for Extended Studies student services.
- TritonPay: View and pay your Extended Studies account balance.
- Veterans Education Benefits: Access resources and information related to veterans education benefits.

-
Latest Results: Displays your most recent grades once they are available. If no grades have been posted yet, this section will show "There are no grades yet."

-
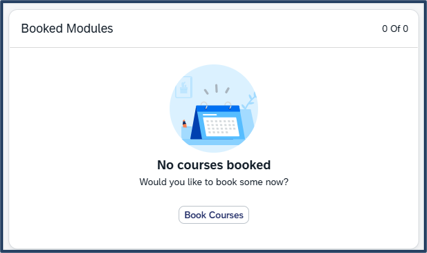
Booked Modules: Shows the courses you are currently booked in for the upcoming or current quarter. If you have not yet booked any courses, this section will show "No courses booked."
- Select Book Courses to begin booking. Read the booking guide to prepare for booking courses.
- Note: Booking courses is only available during your assigned booking window.
-
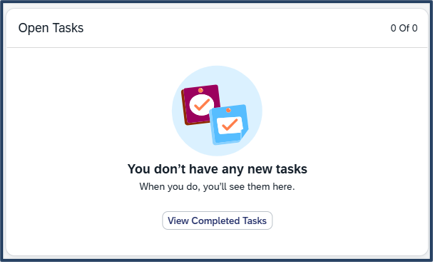
Open Tasks: Displays any pending tasks that require your action. If you have no tasks, this section will show "You don't have any new tasks." Select View Completed Tasks to see tasks you have already finished.
-
Upcoming Events: A calendar view showing your upcoming classes and university events. Events are color-coded: orange for classes, blue for holidays, green for university closures, purple for multiple events on the same day, and red for canceled events. If no classes are booked, the calendar will show "No classes."

-
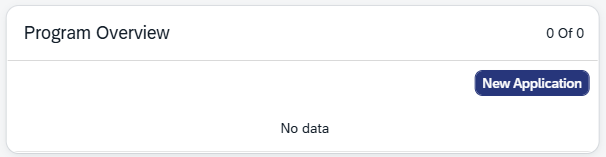
Program Overview: Displays information about your current academic program. If no program data is available, this section will show "No data." You may also start an application for a new program by clicking the New Application button in this window.
Updating and Locating Your Time Zone
TSS allows you to customize how dates, times, and numbers display based on your personal preferences. Follow the instructions below to view and update these settings. NOTE: updating your settings is OPTIONAL. If you are comfortable with how time zones and dates appear in TSS, do not change anything.
1. In the top right corner of the Student Overview Homepage, you will see a circle with your initials in it. Click on the circle.

2. Select settings on the resulting menu.

3. This opens the settings menu. Click Language and Region on the left side menu.

4. The Language and Region screen allows you to update the below fields.
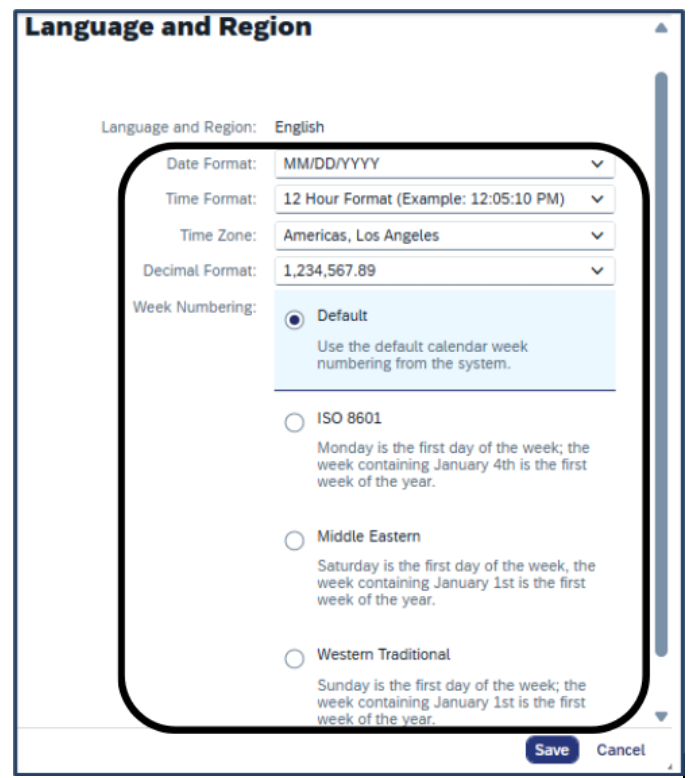
Click on the corresponding drop down menu arrows to select your preferred settings:
- Date Format: Controls how dates display throughout the system. Default: MM/DD/YYYY (month/day/year, e.g., 08/19/2026).
- Time Format: Controls whether times display on a 12-hour clock with AM/PM or a 24-hour clock. Default: 12 Hour Format (e.g., 12:05:10 PM).
- Time Zone: Sets the time zone used for displaying date/time-stamped information. Default: Americas, Los Angeles (Pacific Time). Users in other time zones should update this so deadlines and timestamps display correctly for them.
- Decimal Format: Controls the separators used in displayed numbers (thousands separator and decimal point). Default: 1,234,567.89 (comma for thousands, period for decimal).
- Week Numbering: Determines which day starts the week and how calendar weeks are numbered. Default: Default (system's built-in numbering). Other options users can select:
- ISO 8601 — Monday starts the week; Week 1 contains January 4th
- Middle Eastern — Saturday starts the week; Week 1 contains January 1st
- Western Traditional — Sunday starts the week; Week 1 contains January 1st
5. Once your preferred settings are selected, click Save.
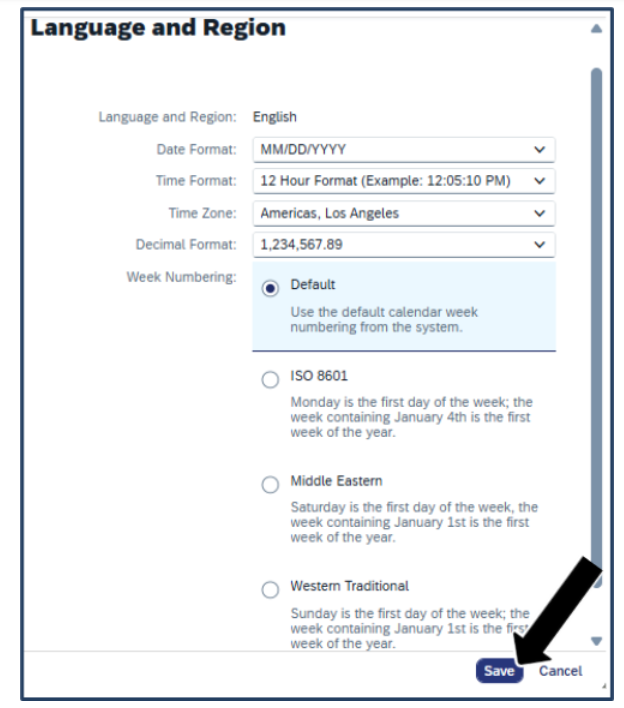
6. A confirmotion message appears at the bottom of the screen once your preferences are successfully updated in TSS.

Find TSS Support
Support Portal: SNOW Ticket Submission
Email tss@ucsd.edu (Mon-Sun)
Call 858-246-4357, press 2 for TSS Support (Mon-Sun)
Join Zoom Office Hours (Mon-Fri only)
For hours and more details, go to: Getting Support For TSS